
Last Updated: October 25, 2026
Quick Summary
To improve UTV suspension for rocky trails, inspect shocks and springs for wear first, then set spring preload for a repeatable ride-height baseline and change compression and rebound one click at a time. Air down tire pressure slightly for sharp edges, and tune softer low-speed compression for rock gardens and firmer high-speed compression for ledges.
- Fix oil weeping, bent shafts, or torn CV boots before adjusting any shock settings.
- Set preload on level ground with your normal load and match left and right sides.
- Change only one damping setting at a time and test the same rough section twice.
- Soften low-speed compression for rock gardens and firm high-speed compression for ledges.
- A zip tie on the shock shaft shows how much travel you use on ledges.
Table of Contents
- Start With a Suspension Inspection Before You Tune
- Set UTV Shock Preload Adjustment for a Repeatable Baseline
- Dial In UTV Compression and Rebound Settings One Change at a Time
- Match UTV Tire Pressure for Rocky Trails
- Tune by Obstacle: Rock Gardens, Ledges, and Cross Chatter
- Know When Stock Shocks Need a Spring Kit or Rebuild
- Book a Baseline Setup at SXS MAYHEM
- Frequently Asked Questions
Start With a Suspension Inspection Before You Tune
Most riders chase a better ride with a click of a knob. That's backwards.
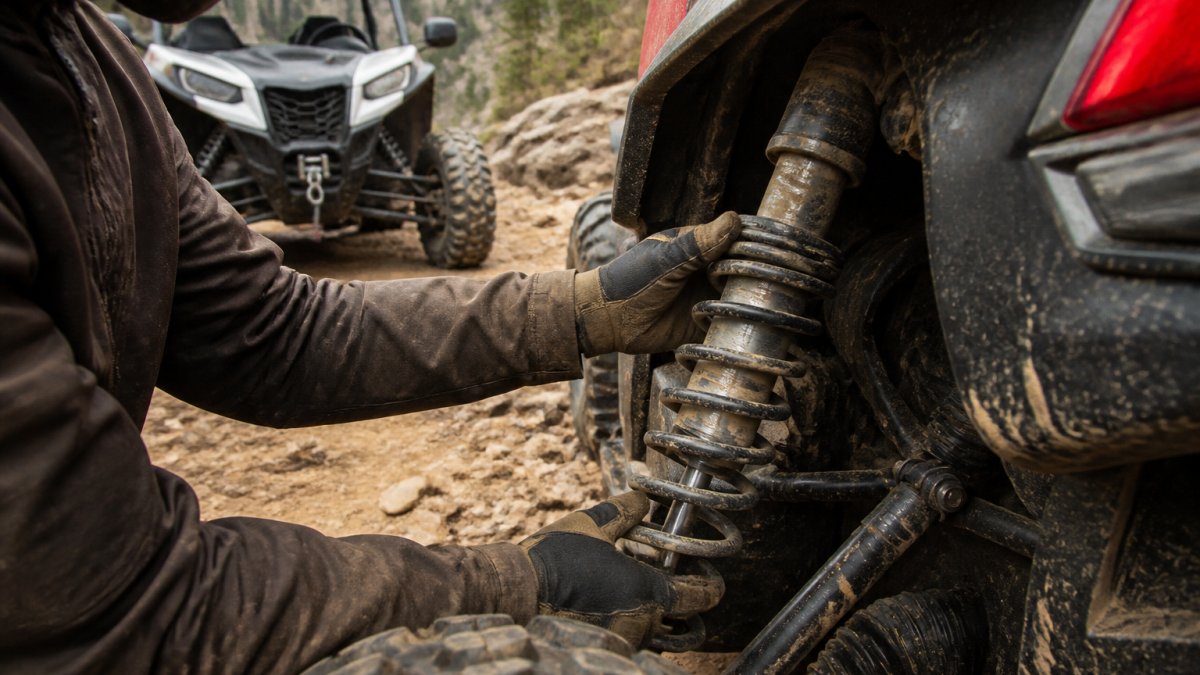
Here's the pre-tune inspection checklist we run:
- Check each shock body for oil weeping or wet dust buildup
- Look for bent shafts, cracked springs, or worn bushings
- Grab each wheel and shake it to feel for play
Watch out: a torn CV boot left alone will sling grease and grind the joint. If you spot one, stop tuning and fix it first.
Tuning a worn shock is wasted effort. For a deeper look at boot failure, read why UTV CV boots keep failing.
Set UTV Shock Preload Adjustment for a Repeatable Baseline
The first real adjustment is spring preload. Preload sets ride height and sag, the foundation every other setting sits on.
Set a baseline the same way every time: park on level ground, load the machine as you actually ride it, and measure frame-to-ground at each corner.
A few rules we follow:
- Set preload so the machine sits at a consistent ride height with normal cargo
- Match left and right sides closely
- Adjust in small, equal steps and re-measure after each change
Too little sag rides harsh; too much bottoms out on big hits. Dial in preload before anything else.
Dial In UTV Compression and Rebound Settings One Change at a Time
Compression damping controls how fast the shock compresses; rebound damping controls how fast it returns. The biggest mistake is changing both at once.
The rule is simple: one change at a time.
- Pick one setting, like low-speed compression
- Turn it two clicks in one direction
- Ride the same rough section twice
- Decide if it got better or worse
- Keep it or revert, then move to the next setting
More compression resists bottoming, less soaks up chop. Rebound controls how the shock resets between bumps: too fast feels loose, too slow packs down over repeated impacts.
A common mistake is over-softening everything to chase comfort. A plush revalve can smooth a choppy ride, but it may cut bottoming resistance, a trade-off riders on MaverickForums suspension tuning threads describe firsthand.
Match UTV Tire Pressure for Rocky Trails
Tire pressure is the cheapest suspension adjustment you have, and most riders ignore it.
Air down in small steps and test. Lower pressure adds traction and comfort but raises pinch-flat and sidewall-damage risk on sharp rock. Find the pressure that soaks up ledges without letting the sidewall fold.
Check these before every rocky ride:
- Cold tire pressure on all four tires
- Even pressure side to side
- Sidewall condition for cuts or bulges
Tire pressure works with your damping, not against it: a softer tire and well-tuned shock handle rocky sections better together than either alone.
Tune by Obstacle: Rock Gardens, Ledges, and Cross Chatter
Rocky trails aren't one thing. A rock garden, a ledge, and cross chatter each punish the suspension differently, and a setting that feels plush in one feels vague or harsh in another.
Before you start, confirm your baseline: ride height recorded at all four corners, tire pressure set, and one adjustment changed at a time. Then work through the obstacle types below.
Rock gardens and embedded rock fields
A rock garden is many small, sharp hits in quick succession. The suspension must absorb each edge without deflecting the machine offline.
Polaris RZR TENDER Spring Kit | MTS Offroad →
- Main adjustment: softer low-speed compression.
- Why it works: low-speed compression controls how the shock responds to shaft speeds you see at trail pace over embedded rocks. Softening it lets the tire and shock swallow the edge instead of transferring it to the chassis.
- Measurable target: count how many times the machine deflects or skips sideways through the same 50-foot rock section. A good tune reduces deflection without letting the front end dive or wallow on the exit.
Ledges and big single hits
A ledge is one large, sudden impact. The goal is bottoming resistance, not plushness.
- Main adjustment: firmer high-speed compression.
- Why it works: high-speed compression controls the shock's response to fast shaft speeds, which is exactly what a ledge produces. Firming it keeps the shock from slamming through its travel on the hit.
- Measurable target: note how often you bottom out on the same ledge. A zip tie on the shock shaft is a simple travel indicator: slide it down against the body, ride the obstacle, and see how far it gets pushed back up. If it reaches the bump stop every time, add high-speed compression or address spring rate.
Cross chatter and diagonal chop
Cross chatter is diagonal, repetitive chop that rattles the whole machine and makes it feel like it's walking sideways. It usually points to rebound that's too fast, letting the shock return before the next impact and upset the chassis.
- Main adjustment: slower rebound.
- Why it works: slower rebound lets the shock reset in a controlled way between repeated impacts instead of packing down or kicking back.
- Measurable target: watch how the machine settles after a series of chatter bumps. If it keeps bouncing or feels like it's skipping, slow rebound a click or two at a time. If it starts packing down and riding low over repeated hits, you've gone too slow.
Washboard and repeated small impacts
Washboard roads and repeated small impacts reward balanced compression and rebound rather than a single extreme setting, the shock must absorb chop without packing down or kicking back.
- Main adjustment: balanced compression and rebound, tuned in small steps.
- Measurable target: ride the same washboard section at the same speed and note whether the machine tracks straight and stays settled. If it skips, soften compression slightly. If it packs down, slow rebound slightly.
| Obstacle | Main adjustment | Measurable check | Common over-adjustment symptom |
|---|---|---|---|
| Rock garden | Softer low-speed compression | Deflection count through a fixed section | Front end feels vague or tucks off-camber |
| Ledges | Firmer high-speed compression | Zip-tie travel indicator on shock shaft | Harsh on square edges, reduced traction on landing |
| Cross chatter | Slower rebound | Settling behavior after repeated chop | Suspension packs down and rides low |
| Washboard | Balanced compression and rebound | Tracking and settle on a fixed section | Skips (too firm) or packs down (rebound too slow) |
This is where a repeatable baseline pays off: you know your starting point, so you can tune toward one obstacle and still return to neutral. Log each change and its effect on the test loop so you can undo a bad adjustment instead of chasing it.
Know When Stock Shocks Need a Spring Kit or Rebuild
Stock UTV suspension is built for a range of riders and loads, and once you add accessories, passengers, or aggressive terrain, the factory setup often can't keep up. But "it feels bad" isn't a diagnosis. Before you buy parts, separate the problem into three buckets: spring rate, damping, and wear. Each points to a different fix.
Diagnose first: spring, damping, or wear?
Use these checks on level ground with the machine loaded the way you actually ride it.
- Sag and ride height: measure frame-to-ground at all four corners. If the machine sits noticeably lower than it did stock, or one corner sags more than the others, the springs are likely too soft for your load or have lost rate.
- Bottoming frequency: a zip tie on the shock shaft shows how much travel you're using. If you're hitting the bump stop on normal rocky trails, you either need more spring rate or more high-speed compression.
- Damping fade: if the ride got bouncy or floaty over time rather than harsh, the shock oil or internals may be worn. A rebuild refreshes damping; a spring kit won't fix faded damping.
When a spring kit is the right fix
A spring kit replaces weak factory springs with higher-quality ones. It's right when:
- Ride height has dropped with your normal load and won't come back with preload adjustment
- You bottom out regularly on rocky trails even after firming high-speed compression
- The machine feels unstable or leans excessively with passengers or cargo
A dual-rate or tender spring setup improves small-bump compliance while keeping bottoming resistance, which is why many rocky-trail riders choose it over a single-rate spring. Match spring rate to your machine, load, and terrain before buying.
When a rebuild is the right fix
A rebuild refreshes worn shock internals when damping has faded. It's right when:
- The ride got progressively bouncier or less controlled over time
- You see oil weeping or wet dust buildup on the shock body
- The shock has significant hours on it and hasn't been serviced
When to seek professional shock service
Some symptoms need a professional rebuild or revalve rather than more knob adjustments:
- Persistent bottoming after spring and compression changes
- A shock that won't hold oil or pressure
- Bent shafts or damaged bodies
A qualified shock shop can revalve the internals to match your weight, load, and terrain in a way external adjusters can't.
Trail-capable UTVs typically have about 12 to 17 inches of suspension travel, according to Rosenau Powersports trail-riding guidance, and more usable travel helps on rougher, rockier ground. A good spring kit helps you use the travel you already have.
We stock kits matched to specific machines:
- Polaris RZR TENDER Spring Kit for smoother chop and washboard control
- MTS Offroad Polaris RZR Spring Kit for a custom dual-rate setup tuned to your terrain
- Kawasaki KRX 1000 2 Seater Dual Rate Spring Kit for more ride height and bottom-out resistance
- Kawasaki KRX 1000 2 Seater Tender Spring Kit for non-Live-Valve shocks
Watch out: buying the wrong spring rate wastes money and can make the ride worse. Match the kit to your machine, load, and terrain before you buy.


Book a Baseline Setup at SXS MAYHEM
Tuning suspension for rocky trails comes down to a process: inspect first, set preload, change one setting at a time, and tune for the obstacle in front of you.
SXS MAYHEM is a family-owned shop built by riders who race and repair their own machines.
Get started with SXS MAYHEM and dial in a suspension setup that handles the rocks the way your machine should.
Frequently Asked Questions
How should I adjust UTV shock preload for rocky trails?
Set preload first, before touching damping. Park on level ground, measure ride height at the frame, then add preload in small increments until you hit your target sag with the machine loaded as you ride it. Keep left and right sides matched. Write down the number of turns so you can return to that baseline. If you run out of preload threads, the spring rate is wrong for your load and a spring kit is the real fix.
How do I set UTV compression and rebound for rocks?
Soften compression a few clicks at a time to take the edge off sharp hits, then test on the same rocky section. If the machine feels loose or bottoms out, add compression back. For rebound, speed it up if the suspension packs down over repeated bumps; slow it down if the machine bounces after a hit. Change one adjuster at a time and log every click so you can undo a bad setting.
Should I change UTV tire pressure for rocky trails?
Yes. Lower pressure lets the tire conform to edges and adds a cushion before the shock works. Drop a few psi at a time from your normal trail pressure and test the same rock section. Stop before sidewalls start folding or you risk pinch flats. Carry a gauge and a small compressor so you can go back up if the trail turns fast and hard-packed.
How can I tell if my UTV shocks need a rebuild or a spring kit?
Look for oil weeping around the shock body, a ride that keeps getting harsher, or bottoming out on hits you used to clear. If the shock is dry but the machine sits low and sags with gear, the springs are tired and a dual-rate or tender spring kit addresses it. If the damping has gone vague or bouncy, that points to a rebuild or replacement. Inspect before you spend on tuning.
