
Last Updated: October 23, 2026
Quick Summary
CV boots keep failing because they sit low, exposed, and constantly flexing, so mud, grit, rocks, and trail debris damage them from outside while suspension travel and axle angles wear them from inside. Most riders blame the boot, but it is usually the victim, not the culprit. Fix the cause, not the rubber.
- Mud packs into boot folds, dries hard, and grinds the sealing surface until grease turns into lapping compound.
- A boot that fails on the same corner at low miles after a suspension change is an angle suspect.
- Cycle the suspension from full droop to full compression and watch for pinching, stretching, or rubbing.
- A small tear with no clicking calls for a boot and grease swap; clicking means replace the axle.
- On a Yamaha YXZ, factory guards cover the outer boots but leave the inner front boots exposed.
Table of Contents
- Why UTV CV Boots Keep Failing: The Core Causes
- How Suspension Movement and Axle Angles Wear Boots Out
- UTV CV Axle Boot Inspection: A Step-by-Step Routine
- Twisted CV Boot Symptoms You Should Not Ignore
- How to Prevent CV Boot Cracking Before It Starts
- CV Boot Replacement: When to Repair and When to Replace
- Diagnosing Repeat Failures: Tracking Conditions and Fitment
- Conclusion
- Frequently Asked Questions
Why UTV CV Boots Keep Failing: The Core Causes
Your UTV's CV boots keep failing because they live in the worst possible place on the machine: low, exposed, and constantly flexing. A CV boot is the rubber sleeve that seals grease inside the CV joint and keeps dirt and water out.
Most riders blame the boot itself. That's backwards, the boot is usually the victim, not the culprit. The reasons break down into two buckets: what hits the boot from outside, and what wears it out from inside.
Mud, Grit, and Debris Damage
Mud is the quiet killer. It packs into the boot's folds, dries hard, then flexes against the rubber every time the suspension moves. Grit works under the clamp and grinds the sealing surface, and once inside, the grease turns into a lapping compound that eats the joint from within. A boot that takes on water and mud loses its grease fast and the joint runs dry.
Rocks, Branches, and Trail Hazards
Direct impacts tear boots open. A rock kicked up by the front tire, a branch dragged across the axle, or a stump strike can slice or puncture the rubber in seconds. Inner front boots sit especially exposed on many machines. This is where prevention pays off: guards and flaps deflect debris before it reaches the rubber, and that single change prevents a lot of repeat failures.
How Suspension Movement and Axle Angles Wear Boots Out
Every bump flexes the boot, and every flex is a small stress cycle. Over thousands of cycles, rubber deteriorates, cracks appear in the folds, and the boot splits. That's normal wear, but lifted suspensions and aggressive travel accelerate it.
Here's what most guides miss: axle angle matters as much as mileage. A lift or suspension change that pushes the CV angle past its designed range keeps the boot stretched in one direction, so the folds never relax, the rubber fatigues faster, and the boot can twist or deform.
Why Angle, Not Just Mileage, Drives Repeat Tears
A CV joint is designed to operate through a specific range of angles (Constant-velocity joint). At ride height the axle sits near its neutral angle; as the suspension compresses and droops, the boot folds and unfolds to follow.
The tell is location and timing. A boot that fails on the same corner, at low miles, shortly after a suspension change is an angle suspect; one that fails after seasons of mud and rocks is a debris suspect.
A Practical Axle-Angle and Travel Check
You don't need an alignment rack to catch a binding or over-angle problem. You need the machine off the ground, the suspension cycled through its travel, and a way to watch the axle and boot as it moves.
- Park on level ground, set the parking brake, and chock the wheels you aren't lifting.
- Lift the front or rear so the suspension hangs at full droop, then support it safely on jack stands.
- With the wheel removed, note the angle of the axle shaft relative to the differential and the hub.
- Slowly raise the suspension with a jack under the lower control arm through its full range, from full droop to full compression.
- Watch the boot as it moves. Look for folds pinching hard against each other at one end of the travel, the boot stretching taut at the other, or the boot rubbing on a control arm, sway bar, or frame.
- Spin the wheel by hand at several points in the travel and listen for clicking, grinding, or a bind that gets tighter as the suspension compresses.
- Repeat on the other side and compare. A side that binds or stretches noticeably more than the other points to a geometry or fitment problem.
A boot that pinches hard at full compression or stretches taut at full droop is telling you the joint is working near or past its designed range.
What to Do With What You Find
If the boot binds or stretches through travel, the fix is geometry, not rubber. Common corrections include adjusting ride height, correcting spring preload, verifying the lift kit is installed per the manufacturer's instructions, and confirming the axle and hub are correct for the machine.
If the boot moves cleanly through travel with no pinch, bind, or rub, angle is probably not your culprit, look harder at debris exposure and installation. That distinction separates a mechanical cause from an environmental one before you spend money on the wrong fix.
So the fix isn't just better rubber. It's keeping the joint within its working range, checking angles after any suspension change, and confirming the boot moves cleanly through full suspension travel.
UTV CV Axle Boot Inspection: A Step-by-Step Routine
A UTV CV axle boot inspection is a five-minute check to run before and after every hard ride.
Here's the routine we recommend:
- Park on level ground and set the parking brake.
- Lift the machine so you can see the axles clearly.
- Check each boot for cracks, splits, or tears in the folds.
- Look for grease slung onto nearby components, a sign of a leak.
- Squeeze the boot gently and check the clamps are tight.
- Spin the wheel and listen for clicking or grinding.
- Note any twisted or deformed boots for closer inspection.
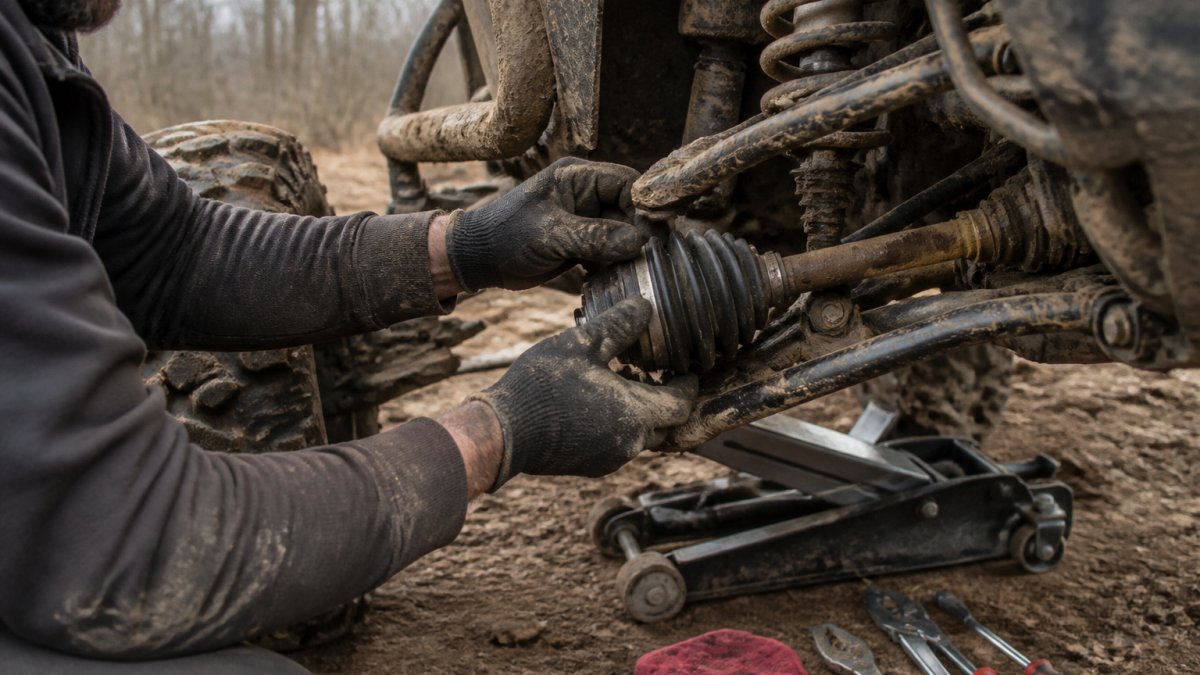
Do this after muddy rides especially. Mud hides tears until the joint is already contaminated.
Twisted CV Boot Symptoms You Should Not Ignore
Twisted CV boot symptoms show up before a full tear and are easy to spot. A twisted boot means the rubber has rotated or deformed on the shaft, usually from an axle-angle problem or a bad install.
Watch for these signs:
- The boot's ribs look spiraled or pinched instead of evenly spaced
- Grease collects on one side of the boot
- The boot bulges oddly when the suspension compresses
A twisted boot is a warning, not a death sentence. Fix the angle or the install before it splits. Ignore it and you're buying an axle.
How to Prevent CV Boot Cracking Before It Starts
Preventing CV boot cracking comes down to keeping debris off the rubber and the joint within its working range. You can't stop wear, but you can slow it down a lot.
HD Front Inner CV Boot Guards for Yamaha YXZ by FASTLAB →
Start with physical protection. We stock HD front inner CV boot guards for the Yamaha YXZ that bolt on using the OEM sway bar bolts.

Then add coverage behind the tires: rock flaps keep sand, rocks, and mud from blasting the rear arms and inner boots. Pro R and Turbo R owners can also pick up a front inner CV boot guard kit.
CV Boot Replacement: When to Repair and When to Replace
CV boot replacement is the right call when the boot is torn but the joint is still tight and quiet, caught early, a new boot and fresh grease solves it.
Use this decision guide:
| What You Find | Action | Why |
|---|---|---|
| Small tear, no clicking | Replace boot and grease | Joint is still good |
| Grease loss, no noise yet | Replace boot, inspect joint | Catch it before wear starts |
| Clicking on turns | Replace the axle | Joint is already worn |
| Twisted boot, tight joint | Fix angle, replace boot | Address the cause too |
| Torn boot plus mud inside | Replace the axle | Contamination ruins the joint |
If you're replacing rather than repairing, fitment matters here, so match the shaft to your machine and your riding style. Pro R owners can shop Polaris Pro R axle shafts to get the right fit.
Diagnosing Repeat Failures: Tracking Conditions and Fitment
Repeat failures almost always trace to one of four things: installation error, fitment problem, angle problem, or riding-condition problem. If the same boot keeps tearing, stop replacing it and start diagnosing, move from "the boot failed again" to a specific cause you can fix once.
Build a Simple Failure Log
You don't need an app. A note on your phone or a page in the shop manual works. For each failure, record:
- Which corner failed (front inner, front outer, rear inner, rear outer, driver or passenger)
- The date and the machine's hours or mileage at failure
- The riding conditions (mud, rocks, sand, tight trails, high-speed desert, water crossings)
Four or five entries turn vague frustration into a pattern that tells you which of the four causes you're dealing with.
The Four Causes and How to Tell Them Apart
Installation error. The boot fails soon after a replacement, often on the same corner, with a twist, slipped clamp, or grease thrown from the clamp area.
Fitment problem. The boot or axle doesn't match the machine, lift, or joint.
Angle problem. The boot fails on the same corner at low miles, especially after a lift or suspension change, and often shows twisting or pinching in the folds.
Riding-condition problem. Failures follow terrain.
Reading the Pattern
A few combinations are especially telling:
- Same corner, soon after a repair, twisted or slipped clamp: installation error.
- Same corner, low miles, after a lift, pinch or stretch through travel: angle problem.
- Same corner, any conditions, boot rubbing or never seating: fitment problem.
When the log points to installation, redo the boot with attention to clamp position and tension, boot orientation, grease quantity, and a clean shaft. For fitment, verify the part against the machine and suspension. For angle, correct the geometry before replacing rubber.
For riders pushing their machines hard, a stronger axle won't fix an angle problem or a debris problem on its own. Riders whose boots keep failing under power can upgrade to heavy-duty Polaris RZR XP Turbo axle shafts built for fitment and durability.
Conclusion
CV boots fail for predictable reasons: debris, impacts, flex, and axle angles pushed past their range. Once you know which one is hitting your machine, you can stop the cycle instead of replacing boots every few rides.
At SXS MAYHEM, we're riders who race and repair our own machines, and we stock the guards, flaps, and axle shafts that solve these failures at the source.
Frequently Asked Questions
What causes a CV boot to go bad?
A CV boot fails when the rubber is damaged or worn past its limits. Mud, grit, and debris grind against the boot surface, rocks and branches strike it on the trail, and repeated suspension movement flexes the material until it cracks or tears. Heat and age also harden the rubber, making it more likely to split. Once a boot tears, grease escapes and dirt and water enter the CV joint, which speeds up wear on the axle. Protecting boots with guards and flaps and inspecting them after every ride are the most reliable ways to catch damage early.
Can suspension lift or extreme axle angles shorten CV boot life?
Yes. Lifts and extreme axle angles increase how far the CV joint articulates through suspension travel, which stretches and compresses the boot more aggressively on every bump. That extra flexing accelerates rubber deterioration and can cause a twisted CV boot or premature cracking. If you run a lift, check axle angles and inspect boots more often. Keeping suspension travel within the range your axles were designed for, and watching for boot deformation after install, will extend boot life and reduce repeat failures on the trail.
Can a UTV CV boot be repaired, or does it need to be replaced?
A torn or split boot needs replacement, not a patch. Once the rubber is compromised, grease loss and contamination have already started, so cleaning and re-greasing the joint with a new boot and clamp is the standard fix. If the joint shows wear, grinding, or play, the whole CV axle may need replacement. Small cracks caught early during a UTV CV axle boot inspection can sometimes be monitored, but any tear that exposes the joint should be addressed before your next ride to avoid axle failure.
How do you inspect a UTV CV boot for damage?
Park on level ground, lift the machine so the wheels are off the ground, and check each boot for cracks, splits, tears, or grease leak residue on nearby components. Twist and flex the boot by hand to reveal hidden cracks, and check the clamps for looseness. Look for a twisted CV boot or boot deformation that suggests an axle-angle problem. Run this inspection after muddy or rocky rides, and note which corners fail most often so you can target protection like boot guards and rock flaps.
Stop guessing why your boots keep tearing. Get the right guards and axle parts fitted for your machine, and get back to riding. Get started with SXS MAYHEM and protect your CV joints before the next trail takes them out.
